卷积自编码器

卷积自编码器

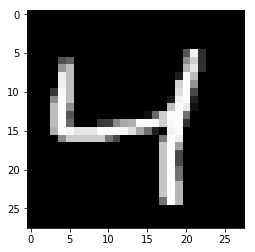
这一次我们使用基于卷积的自编码器,仍然使用MNIST数据集。

%matplotlib inline

import numpy as np
import tensorflow as tf
import matplotlib.pyplot as plt
from tensorflow.examples.tutorials.mnist import input_data
mnist = input_data.read_data_sets('MNIST_data', validation_size=0)
Extracting MNIST_data/train-images-idx3-ubyte.gz
Extracting MNIST_data/train-labels-idx1-ubyte.gz
Extracting MNIST_data/t10k-images-idx3-ubyte.gz
Extracting MNIST_data/t10k-labels-idx1-ubyte.gz
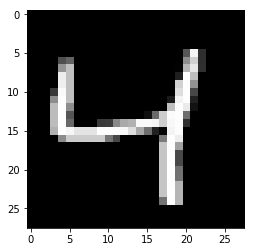
img = mnist.train.images[2]
plt.imshow(img.reshape((28, 28)), cmap='Greys_r')
<matplotlib.image.AxesImage at 0x7f4631f1a4e0>
png

网络架构

网络的编码器部分将是典型的卷积金字塔。每个卷积层之后将跟随有最大池化层以减小层的尺寸。解码器对你来说可能是陌生的。解码器需要从窄表示转换为宽表示,进而重构图像。例如,表示可以是4x4x8最大池化层。这是编码器的输出,同时作为解码器的输入。我们想从解码器得到一个28x28x1图像,所以我们需要从狭窄的解码器输入层返回。网络示意图如下所示。

这里,我们的最终编码器层的大小为4x4x8 = 128。原始图像具有尺寸28x28 = 784,因此编码向量大约是原始图像的尺寸的16%。这些只是每个层的建议尺寸。您可以随意更改深度和大小,但请记住,我们在这里的目标是找到小的输入数据表示。

解码器做了什么?

解码器有Upsample 层,可能你之前没有见过。通常,通过使用transposed convolution 来增加层的宽度和高度。这个与卷积操作很相似,只是反过来了。 例如,如果您有一个3x3内核,则输入层中的3x3将减少到卷积层中的一个单元。相比之下,输入层中的一个单元将扩展到转置卷积层中的3×3路径。TensorFlow 提供了这样的方法,我们可以直接使用, tf.nn.conv2d_transpose.

但是,转置卷积层会导致最终图像中的伪像,如棋盘图案。 这是由于内核的重叠,可以通过设置stridekernel大小相等来避免。 在这篇文章中this Distill article ,作者展示了,如何避免该情况的发生. 在 TensorFlow, 很容易实现tf.image.resize_images

inputs_ = tf.placeholder(tf.float32, (None, 28, 28, 1), name='inputs')
targets_ = tf.placeholder(tf.float32, (None, 28, 28, 1), name='targets')

### Encoder
conv1 = tf.layers.conv2d(inputs_, 16, (3,3), padding='same', activation=tf.nn.relu)
# Now 28x28x16
maxpool1 = tf.layers.max_pooling2d(conv1, (2,2), (2,2), padding='same')
# Now 14x14x16
conv2 = tf.layers.conv2d(maxpool1, 8, (3,3), padding='same', activation=tf.nn.relu)
# Now 14x14x8
maxpool2 = tf.layers.max_pooling2d(conv2, (2,2), (2,2), padding='same')
# Now 7x7x8
conv3 = tf.layers.conv2d(maxpool2, 8, (3,3), padding='same', activation=tf.nn.relu)
# Now 7x7x8
encoded = tf.layers.max_pooling2d(conv3, (2,2), (2,2), padding='same')
# Now 4x4x8

### Decoder
upsample1 = tf.image.resize_nearest_neighbor(encoded, (7,7))
# Now 7x7x8
conv4 = tf.layers.conv2d(upsample1, 8, (3,3), padding='same', activation=tf.nn.relu)
# Now 7x7x8
upsample2 = tf.image.resize_nearest_neighbor(conv4, (14,14))
# Now 14x14x8
conv5 = tf.layers.conv2d(upsample2, 8, (3,3), padding='same', activation=tf.nn.relu)
# Now 14x14x8
upsample3 = tf.image.resize_nearest_neighbor(conv5, (28,28))
# Now 28x28x8
conv6 = tf.layers.conv2d(upsample3, 16, (3,3), padding='same', activation=tf.nn.relu)
# Now 28x28x16

logits = tf.layers.conv2d(conv6, 1, (3,3), padding='same', activation=None)
#Now 28x28x1

decoded = tf.nn.sigmoid(logits, name='decoded')

loss = tf.nn.sigmoid_cross_entropy_with_logits(labels=targets_, logits=logits)
cost = tf.reduce_mean(loss)
opt = tf.train.AdamOptimizer(0.001).minimize(cost)

训练

和以前一样,这里我们将训练网络。我们可以将图像作为28x28x1传递输入,而不是平面化图像。

sess = tf.Session()
epochs = 20
batch_size = 200
sess.run(tf.global_variables_initializer())
for e in range(epochs):
    for ii in range(mnist.train.num_examples//batch_size):
        batch = mnist.train.next_batch(batch_size)
        imgs = batch[0].reshape((-1, 28, 28, 1))
        batch_cost, _ = sess.run([cost, opt], feed_dict={inputs_: imgs,
                                                         targets_: imgs})

        print("Epoch: {}/{}...".format(e+1, epochs),
              "Training loss: {:.4f}".format(batch_cost))
fig, axes = plt.subplots(nrows=2, ncols=10, sharex=True, sharey=True, figsize=(20,4))
in_imgs = mnist.test.images[:10]
reconstructed = sess.run(decoded, feed_dict={inputs_: in_imgs.reshape((10, 28, 28, 1))})

for images, row in zip([in_imgs, reconstructed], axes):
    for img, ax in zip(images, row):
        ax.imshow(img.reshape((28, 28)), cmap='Greys_r')
        ax.get_xaxis().set_visible(False)
        ax.get_yaxis().set_visible(False)


fig.tight_layout(pad=0.1)

png

sess.close()

降噪

正如之前所提到的,自动编码器在实践中并不太有用。然而,仅通过对噪声图像的网络训练,它们就可以成功地用于图像去噪。我们可以通过向训练图像添加高斯噪声,然后将这些值裁剪到0到1之间,来自己创建噪声图像。我们将使用噪声图像作为输入,而原始的干净图像作为目标。下面是噪声图像和去噪图像的示例。

Denoising autoencoder 由于这对于网络来说是一个更困难的问题,我们希望在这里使用更深的卷积层,更多的特征映射。对于编码器中卷积层的深度,建议使用32 - 32 - 16,同样的深度通过解码器。否则体系结构与以前相同。

inputs_ = tf.placeholder(tf.float32, (None, 28, 28, 1), name='inputs')
targets_ = tf.placeholder(tf.float32, (None, 28, 28, 1), name='targets')

### Encoder
conv1 = tf.layers.conv2d(inputs_, 32, (3,3), padding='same', activation=tf.nn.relu)
# Now 28x28x32
maxpool1 = tf.layers.max_pooling2d(conv1, (2,2), (2,2), padding='same')
# Now 14x14x32
conv2 = tf.layers.conv2d(maxpool1, 32, (3,3), padding='same', activation=tf.nn.relu)
# Now 14x14x32
maxpool2 = tf.layers.max_pooling2d(conv2, (2,2), (2,2), padding='same')
# Now 7x7x32
conv3 = tf.layers.conv2d(maxpool2, 16, (3,3), padding='same', activation=tf.nn.relu)
# Now 7x7x16
encoded = tf.layers.max_pooling2d(conv3, (2,2), (2,2), padding='same')
# Now 4x4x16

### Decoder
upsample1 = tf.image.resize_nearest_neighbor(encoded, (7,7))
# Now 7x7x16
conv4 = tf.layers.conv2d(upsample1, 16, (3,3), padding='same', activation=tf.nn.relu)
# Now 7x7x16
upsample2 = tf.image.resize_nearest_neighbor(conv4, (14,14))
# Now 14x14x16
conv5 = tf.layers.conv2d(upsample2, 32, (3,3), padding='same', activation=tf.nn.relu)
# Now 14x14x32
upsample3 = tf.image.resize_nearest_neighbor(conv5, (28,28))
# Now 28x28x32
conv6 = tf.layers.conv2d(upsample3, 32, (3,3), padding='same', activation=tf.nn.relu)
# Now 28x28x32

logits = tf.layers.conv2d(conv6, 1, (3,3), padding='same', activation=None)
#Now 28x28x1

decoded = tf.nn.sigmoid(logits, name='decoded')

loss = tf.nn.sigmoid_cross_entropy_with_logits(labels=targets_, logits=logits)
cost = tf.reduce_mean(loss)
opt = tf.train.AdamOptimizer(0.001).minimize(cost)
sess = tf.Session()
epochs = 100
batch_size = 200
# Set's how much noise we're adding to the MNIST images
noise_factor = 0.5
sess.run(tf.global_variables_initializer())
for e in range(epochs):
    for ii in range(mnist.train.num_examples//batch_size):
        batch = mnist.train.next_batch(batch_size)
        # Get images from the batch
        imgs = batch[0].reshape((-1, 28, 28, 1))
        
        # Add random noise to the input images
        noisy_imgs = imgs + noise_factor * np.random.randn(*imgs.shape)
        # Clip the images to be between 0 and 1
        noisy_imgs = np.clip(noisy_imgs, 0., 1.)
        
        # Noisy images as inputs, original images as targets
        batch_cost, _ = sess.run([cost, opt], feed_dict={inputs_: noisy_imgs,
                                                         targets_: imgs})

        print("Epoch: {}/{}...".format(e+1, epochs),
              "Training loss: {:.4f}".format(batch_cost))

验证性能

Here I’m adding noise to the test images and passing them through the autoencoder. It does a suprising great job of removing the noise, even though it’s sometimes difficult to tell what the original number is.

fig, axes = plt.subplots(nrows=2, ncols=10, sharex=True, sharey=True, figsize=(20,4))
in_imgs = mnist.test.images[:10]
noisy_imgs = in_imgs + noise_factor * np.random.randn(*in_imgs.shape)
noisy_imgs = np.clip(noisy_imgs, 0., 1.)

reconstructed = sess.run(decoded, feed_dict={inputs_: noisy_imgs.reshape((10, 28, 28, 1))})

for images, row in zip([noisy_imgs, reconstructed], axes):
    for img, ax in zip(images, row):
        ax.imshow(img.reshape((28, 28)), cmap='Greys_r')
        ax.get_xaxis().set_visible(False)
        ax.get_yaxis().set_visible(False)

fig.tight_layout(pad=0.1)

png

自编码器

简单的自编码器

我们将会构建一个简单的自编码器来压缩MNIST数据集。通过编码器传入输入数据,它会压缩输入数据,然后,被压缩的数据再传给解码器,它重构输入数据。通常使用神经网络来构建编码器与解码器,然后进行数据训练。 Autoencoder

%matplotlib inline

import numpy as np
import tensorflow as tf
import matplotlib.pyplot as plt
from tensorflow.examples.tutorials.mnist import input_data
mnist = input_data.read_data_sets('MNIST_data', validation_size=0)
Successfully downloaded train-images-idx3-ubyte.gz 9912422 bytes.
Extracting MNIST_data/train-images-idx3-ubyte.gz
Successfully downloaded train-labels-idx1-ubyte.gz 28881 bytes.
Extracting MNIST_data/train-labels-idx1-ubyte.gz
Successfully downloaded t10k-images-idx3-ubyte.gz 1648877 bytes.
Extracting MNIST_data/t10k-images-idx3-ubyte.gz
Successfully downloaded t10k-labels-idx1-ubyte.gz 4542 bytes.
Extracting MNIST_data/t10k-labels-idx1-ubyte.gz

通过上面将导入数据集,我们可以查看一下其中的一张图片。

img = mnist.train.images[2]
plt.imshow(img.reshape((28, 28)), cmap='Greys_r')
<matplotlib.image.AxesImage at 0x11abae4a8>

png

首先我们把图像扁平化长度为784的一个向量,然后传入代自编码器进行训练。这些值已经进过归一化处理了,值都在0到1之间。自编码器中的激活函数使用的是ReLU,它用于压缩输入,然后经过解码器,因为我们的值都是在0到1之间,所以最后我们使用了sigmoid作为激活函数。 Autoencoder architecture

# Size of the encoding layer (the hidden layer)
encoding_dim = 32

image_size = mnist.train.images.shape[1]

inputs_ = tf.placeholder(tf.float32, (None, image_size), name='inputs')
targets_ = tf.placeholder(tf.float32, (None, image_size), name='targets')

# Output of hidden layer
encoded = tf.layers.dense(inputs_, encoding_dim, activation=tf.nn.relu)

# Output layer logits
logits = tf.layers.dense(encoded, image_size, activation=None)
# Sigmoid output from
decoded = tf.nn.sigmoid(logits, name='output')

loss = tf.nn.sigmoid_cross_entropy_with_logits(labels=targets_, logits=logits)
cost = tf.reduce_mean(loss)
opt = tf.train.AdamOptimizer(0.001).minimize(cost)

训练

# Create the session
sess = tf.Session()
epochs = 20
batch_size = 200
sess.run(tf.global_variables_initializer())
for e in range(epochs):
    for ii in range(mnist.train.num_examples//batch_size):
        batch = mnist.train.next_batch(batch_size)
        feed = {inputs_: batch[0], targets_: batch[0]}
        batch_cost, _ = sess.run([cost, opt], feed_dict=feed)

        print("Epoch: {}/{}...".format(e+1, epochs),
              "Training loss: {:.4f}".format(batch_cost))

结果检验

fig, axes = plt.subplots(nrows=2, ncols=10, sharex=True, sharey=True, figsize=(20,4))
in_imgs = mnist.test.images[:10]
reconstructed, compressed = sess.run([decoded, encoded], feed_dict={inputs_: in_imgs})

for images, row in zip([in_imgs, reconstructed], axes):
    for img, ax in zip(images, row):
        ax.imshow(img.reshape((28, 28)), cmap='Greys_r')
        ax.get_xaxis().set_visible(False)
        ax.get_yaxis().set_visible(False)

fig.tight_layout(pad=0.1)

png

sess.close()

接下来

我们在这里处理的是图像,因此我们可以使用卷积层获得更好的性能。接下来,我们将构建一个更好的具有卷积层的自动编码器。 实际上,与JPEGs和MP3等典型方法相比,自动编码器在压缩方面并不擅长。但是,它们可以被用来降低噪音。

批量归一化实践

批量归一化 – 实践

批量归一化在深度神经网络中很有用。为了证明这一点,我们将会创建一个20层卷积层和一个全连接层的卷积神经网络。我们所使用的数据集是 MNIST数据集。 需要注意的是,这对MNIST数据集并不是一个好的分类神经网络,你可以直接设计一个更简单更好的网络。我们为了显示出批量归一化的好处,而做出了一些特定的处理:

  1. 网络足够复杂,使用批量归一化将会有更明显的好处。
  2. 网络训练简单,易于使用批量归一化。
  3. 网络架构简单易于实现。

我们会使用两个版本的批量归一化,一个进行了更多的封装操作,一个只是具有简单的功能,你可以在之前的文章中看他们的区别

  1. Batch Normalization with tf.layers.batch_normalization
  2. Batch Normalization with tf.nn.batch_normalization

首先我们需要去下载数据集。

import tensorflow as tf
from tensorflow.examples.tutorials.mnist import input_data
mnist = input_data.read_data_sets("MNIST_data/", one_hot=True, reshape=False)
Successfully downloaded train-images-idx3-ubyte.gz 9912422 bytes.
Extracting MNIST_data/train-images-idx3-ubyte.gz
Successfully downloaded train-labels-idx1-ubyte.gz 28881 bytes.
Extracting MNIST_data/train-labels-idx1-ubyte.gz
Successfully downloaded t10k-images-idx3-ubyte.gz 1648877 bytes.
Extracting MNIST_data/t10k-images-idx3-ubyte.gz
Successfully downloaded t10k-labels-idx1-ubyte.gz 4542 bytes.
Extracting MNIST_data/t10k-labels-idx1-ubyte.gz

使用 tf.layers.batch_normalization实现归一化

tf.layers版本的使用更加常见,tf.layers.batch_normalization

我们将会使用下面的函数来实现全链接层,现在还没有使用归一化操作。

"""
DO NOT MODIFY THIS CELL
"""
def fully_connected(prev_layer, num_units):
    """
    Create a fully connectd layer with the given layer as input and the given number of neurons.
    
    :param prev_layer: Tensor
        The Tensor that acts as input into this layer
    :param num_units: int
        The size of the layer. That is, the number of units, nodes, or neurons.
    :returns Tensor
        A new fully connected layer
    """
    layer = tf.layers.dense(prev_layer, num_units, activation=tf.nn.relu)
    return layer

我们将会使用下面的函数实现卷积层,现在还没有使用归一化操作。

"""
DO NOT MODIFY THIS CELL
"""
def conv_layer(prev_layer, layer_depth):
    """
    Create a convolutional layer with the given layer as input.
    
    :param prev_layer: Tensor
        The Tensor that acts as input into this layer
    :param layer_depth: int
        We'll set the strides and number of feature maps based on the layer's depth in the network.
        This is *not* a good way to make a CNN, but it helps us create this example with very little code.
    :returns Tensor
        A new convolutional layer
    """
    strides = 2 if layer_depth % 3 == 0 else 1
    conv_layer = tf.layers.conv2d(prev_layer, layer_depth*4, 3, strides, 'same', activation=tf.nn.relu)
    return conv_layer

下面的函数将会构建一个网络并进行训练,此时还没有进行归一化。

"""
DO NOT MODIFY THIS CELL
"""
def train(num_batches, batch_size, learning_rate):
    # Build placeholders for the input samples and labels 
    inputs = tf.placeholder(tf.float32, [None, 28, 28, 1])
    labels = tf.placeholder(tf.float32, [None, 10])
    
    # Feed the inputs into a series of 20 convolutional layers 
    layer = inputs
    for layer_i in range(1, 20):
        layer = conv_layer(layer, layer_i)

    # Flatten the output from the convolutional layers 
    orig_shape = layer.get_shape().as_list()
    layer = tf.reshape(layer, shape=[-1, orig_shape[1] * orig_shape[2] * orig_shape[3]])

    # Add one fully connected layer
    layer = fully_connected(layer, 100)

    # Create the output layer with 1 node for each 
    logits = tf.layers.dense(layer, 10)
    
    # Define loss and training operations
    model_loss = tf.reduce_mean(tf.nn.sigmoid_cross_entropy_with_logits(logits=logits, labels=labels))
    train_opt = tf.train.AdamOptimizer(learning_rate).minimize(model_loss)
    
    # Create operations to test accuracy
    correct_prediction = tf.equal(tf.argmax(logits,1), tf.argmax(labels,1))
    accuracy = tf.reduce_mean(tf.cast(correct_prediction, tf.float32))
    
    # Train and test the network
    with tf.Session() as sess:
        sess.run(tf.global_variables_initializer())
        for batch_i in range(num_batches):
            batch_xs, batch_ys = mnist.train.next_batch(batch_size)

            # train this batch
            sess.run(train_opt, {inputs: batch_xs, labels: batch_ys})
            
            # Periodically check the validation or training loss and accuracy
            if batch_i % 100 == 0:
                loss, acc = sess.run([model_loss, accuracy], {inputs: mnist.validation.images,
                                                              labels: mnist.validation.labels})
                print('Batch: {:>2}: Validation loss: {:>3.5f}, Validation accuracy: {:>3.5f}'.format(batch_i, loss, acc))
            elif batch_i % 25 == 0:
                loss, acc = sess.run([model_loss, accuracy], {inputs: batch_xs, labels: batch_ys})
                print('Batch: {:>2}: Training loss: {:>3.5f}, Training accuracy: {:>3.5f}'.format(batch_i, loss, acc))

        # At the end, score the final accuracy for both the validation and test sets
        acc = sess.run(accuracy, {inputs: mnist.validation.images,
                                  labels: mnist.validation.labels})
        print('Final validation accuracy: {:>3.5f}'.format(acc))
        acc = sess.run(accuracy, {inputs: mnist.test.images,
                                  labels: mnist.test.labels})
        print('Final test accuracy: {:>3.5f}'.format(acc))
        
        # Score the first 100 test images individually. This won't work if batch normalization isn't implemented correctly.
        correct = 0
        for i in range(100):
            correct += sess.run(accuracy,feed_dict={inputs: [mnist.test.images[i]],
                                                    labels: [mnist.test.labels[i]]})

        print("Accuracy on 100 samples:", correct/100)


num_batches = 800
batch_size = 64
learning_rate = 0.002

tf.reset_default_graph()
with tf.Graph().as_default():
    train(num_batches, batch_size, learning_rate)
Batch:  0: Validation loss: 0.69062, Validation accuracy: 0.09860
Batch: 25: Training loss: 0.35044, Training accuracy: 0.07812
Batch: 50: Training loss: 0.32532, Training accuracy: 0.10938
Batch: 75: Training loss: 0.32628, Training accuracy: 0.06250
Batch: 100: Validation loss: 0.32518, Validation accuracy: 0.10700
Batch: 125: Training loss: 0.32709, Training accuracy: 0.03125
Batch: 150: Training loss: 0.32582, Training accuracy: 0.09375
Batch: 175: Training loss: 0.32305, Training accuracy: 0.21875
Batch: 200: Validation loss: 0.32584, Validation accuracy: 0.09860
Batch: 225: Training loss: 0.32501, Training accuracy: 0.15625
Batch: 250: Training loss: 0.32705, Training accuracy: 0.07812
Batch: 275: Training loss: 0.32302, Training accuracy: 0.12500
Batch: 300: Validation loss: 0.32591, Validation accuracy: 0.08680
Batch: 325: Training loss: 0.32264, Training accuracy: 0.15625
Batch: 350: Training loss: 0.32369, Training accuracy: 0.12500
Batch: 375: Training loss: 0.32658, Training accuracy: 0.09375
Batch: 400: Validation loss: 0.32506, Validation accuracy: 0.11260
Batch: 425: Training loss: 0.32533, Training accuracy: 0.09375
Batch: 450: Training loss: 0.32705, Training accuracy: 0.10938
Batch: 475: Training loss: 0.32655, Training accuracy: 0.04688
Batch: 500: Validation loss: 0.32510, Validation accuracy: 0.10020
Batch: 525: Training loss: 0.33035, Training accuracy: 0.01562
Batch: 550: Training loss: 0.32439, Training accuracy: 0.09375
Batch: 575: Training loss: 0.32113, Training accuracy: 0.20312
Batch: 600: Validation loss: 0.32499, Validation accuracy: 0.11260
Batch: 625: Training loss: 0.32403, Training accuracy: 0.14062
Batch: 650: Training loss: 0.33020, Training accuracy: 0.03125
Batch: 675: Training loss: 0.31972, Training accuracy: 0.12500
Batch: 700: Validation loss: 0.29751, Validation accuracy: 0.20460
Batch: 725: Training loss: 0.34273, Training accuracy: 0.06250
Batch: 750: Training loss: 0.31551, Training accuracy: 0.28125
Batch: 775: Training loss: 0.28567, Training accuracy: 0.25000
Final validation accuracy: 0.30420
Final test accuracy: 0.29490
Accuracy on 100 samples: 0.28

因为有很多层,所以网络将要迭代很多次进行学习。当训练结束时,网络的准确率应该不太高。 那么接下来我们添加归一化操作,看看结果如何。

归一化

接下来的代码跟之前很相似,只是我们通过 tf.layers.batch_normalization 添加了归一化。

def fully_connected(prev_layer, num_units, is_training):
    """
    Create a fully connectd layer with the given layer as input and the given number of neurons.
    
    :param prev_layer: Tensor
        The Tensor that acts as input into this layer
    :param num_units: int
        The size of the layer. That is, the number of units, nodes, or neurons.
    :returns Tensor
        A new fully connected layer
    """
    layer = tf.layers.dense(prev_layer, num_units, use_bias=False, activation=None)
    layer = tf.layers.batch_normalization(layer, training=is_training) #归一化
    layer = tf.nn.relu(layer)
    return layer
def conv_layer(prev_layer, layer_depth, is_training):
    """
    Create a convolutional layer with the given layer as input.
    
    :param prev_layer: Tensor
        The Tensor that acts as input into this layer
    :param layer_depth: int
        We'll set the strides and number of feature maps based on the layer's depth in the network.
        This is *not* a good way to make a CNN, but it helps us create this example with very little code.
    :returns Tensor
        A new convolutional layer
    """
    strides = 2 if layer_depth % 3 == 0 else 1
    conv_layer = tf.layers.conv2d(prev_layer, layer_depth*4, 3, strides, 'same', use_bias=False, activation=None)
    conv_layer = tf.layers.batch_normalization(conv_layer, training=is_training)#归一化
    conv_layer = tf.nn.relu(conv_layer)
    return conv_layer
def train(num_batches, batch_size, learning_rate):
    # Build placeholders for the input samples and labels 
    inputs = tf.placeholder(tf.float32, [None, 28, 28, 1])
    labels = tf.placeholder(tf.float32, [None, 10])
    
    is_training = tf.placeholder(tf.bool)
    # Feed the inputs into a series of 20 convolutional layers 
    layer = inputs
    for layer_i in range(1, 20):
        layer = conv_layer(layer, layer_i, is_training)

    # Flatten the output from the convolutional layers 
    orig_shape = layer.get_shape().as_list()
    layer = tf.reshape(layer, shape=[-1, orig_shape[1] * orig_shape[2] * orig_shape[3]])

    # Add one fully connected layer
    layer = fully_connected(layer, 100,is_training)

    # Create the output layer with 1 node for each 
    logits = tf.layers.dense(layer, 10)
    
    # Define loss and training operations
    model_loss = tf.reduce_mean(tf.nn.sigmoid_cross_entropy_with_logits(logits=logits, labels=labels))
    
    # Tell TensorFlow to update the population statistics while training
    with tf.control_dependencies(tf.get_collection(tf.GraphKeys.UPDATE_OPS)):
        train_opt = tf.train.AdamOptimizer(learning_rate).minimize(model_loss)
 
    
    # Create operations to test accuracy
    correct_prediction = tf.equal(tf.argmax(logits,1), tf.argmax(labels,1))
    accuracy = tf.reduce_mean(tf.cast(correct_prediction, tf.float32))
    
    # Train and test the network
    with tf.Session() as sess:
        sess.run(tf.global_variables_initializer())
        for batch_i in range(num_batches):
            batch_xs, batch_ys = mnist.train.next_batch(batch_size)

            # train this batch
            sess.run(train_opt, {inputs: batch_xs, labels: batch_ys, is_training: True})
            
            # Periodically check the validation or training loss and accuracy
            if batch_i % 100 == 0:
                loss, acc = sess.run([model_loss, accuracy], {inputs: mnist.validation.images,
                                                              labels: mnist.validation.labels,
                                                              is_training: False})
                print('Batch: {:>2}: Validation loss: {:>3.5f}, Validation accuracy: {:>3.5f}'.format(batch_i, loss, acc))
            elif batch_i % 25 == 0:
                loss, acc = sess.run([model_loss, accuracy], {inputs: batch_xs, labels: batch_ys, is_training: False})
                print('Batch: {:>2}: Training loss: {:>3.5f}, Training accuracy: {:>3.5f}'.format(batch_i, loss, acc))

        # At the end, score the final accuracy for both the validation and test sets
        acc = sess.run(accuracy, {inputs: mnist.validation.images,
                                  labels: mnist.validation.labels,
                                  is_training: False})
        print('Final validation accuracy: {:>3.5f}'.format(acc))
        acc = sess.run(accuracy, {inputs: mnist.test.images,
                                  labels: mnist.test.labels,
                                  is_training: False})
        print('Final test accuracy: {:>3.5f}'.format(acc))
        
        # Score the first 100 test images individually. This won't work if batch normalization isn't implemented correctly.
        correct = 0
        for i in range(100):
            correct += sess.run(accuracy,feed_dict={inputs: [mnist.test.images[i]],
                                                    labels: [mnist.test.labels[i]],
                                                    is_training: False})

        print("Accuracy on 100 samples:", correct/100)


num_batches = 800
batch_size = 64
learning_rate = 0.002

tf.reset_default_graph()
with tf.Graph().as_default():
    train(num_batches, batch_size, learning_rate)
Batch:  0: Validation loss: 0.69050, Validation accuracy: 0.09900
Batch: 25: Training loss: 0.56782, Training accuracy: 0.04688
Batch: 50: Training loss: 0.45753, Training accuracy: 0.09375
Batch: 75: Training loss: 0.38981, Training accuracy: 0.10938
Batch: 100: Validation loss: 0.35713, Validation accuracy: 0.09900
Batch: 125: Training loss: 0.34297, Training accuracy: 0.15625
Batch: 150: Training loss: 0.33817, Training accuracy: 0.01562
Batch: 175: Training loss: 0.33227, Training accuracy: 0.06250
Batch: 200: Validation loss: 0.33167, Validation accuracy: 0.26160
Batch: 225: Training loss: 0.38631, Training accuracy: 0.18750
Batch: 250: Training loss: 0.33774, Training accuracy: 0.34375
Batch: 275: Training loss: 0.20149, Training accuracy: 0.59375
Batch: 300: Validation loss: 0.17220, Validation accuracy: 0.63080
Batch: 325: Training loss: 0.07430, Training accuracy: 0.89062
Batch: 350: Training loss: 0.09011, Training accuracy: 0.87500
Batch: 375: Training loss: 0.03864, Training accuracy: 0.89062
Batch: 400: Validation loss: 0.06403, Validation accuracy: 0.90200
Batch: 425: Training loss: 0.06060, Training accuracy: 0.92188
Batch: 450: Training loss: 0.03130, Training accuracy: 0.93750
Batch: 475: Training loss: 0.02583, Training accuracy: 0.96875
Batch: 500: Validation loss: 0.02855, Validation accuracy: 0.96100
Batch: 525: Training loss: 0.16131, Training accuracy: 0.76562
Batch: 550: Training loss: 0.00370, Training accuracy: 1.00000
Batch: 575: Training loss: 0.04717, Training accuracy: 0.92188
Batch: 600: Validation loss: 0.05843, Validation accuracy: 0.91880
Batch: 625: Training loss: 0.02037, Training accuracy: 0.95312
Batch: 650: Training loss: 0.04496, Training accuracy: 0.92188
Batch: 675: Training loss: 0.09602, Training accuracy: 0.85938
Batch: 700: Validation loss: 0.05082, Validation accuracy: 0.93260
Batch: 725: Training loss: 0.03261, Training accuracy: 0.95312
Batch: 750: Training loss: 0.00247, Training accuracy: 1.00000
Batch: 775: Training loss: 0.04725, Training accuracy: 0.93750
Final validation accuracy: 0.87940
Final test accuracy: 0.88330
Accuracy on 100 samples: 0.85

使用了批量归一化后,准确率大大提高了。注意我们使用了is_training参数来判断是否处于训练阶段,还是测试阶段。

使用tf.nn.batch_normalization实现归一化

很多时候,我们都会直接使用进过封装后的包进行批量归一化操作,但是有时我们想要实现在TensorFlow在没有实现的操作,比如在LSTM中实现归一化,这时,我们就得自己实现批量归一化的细节了。 我们使用的函数是tf.nn.batch_normalization.

def fully_connected(prev_layer, num_units, is_training):
    """
    Create a fully connectd layer with the given layer as input and the given number of neurons.
    
    :param prev_layer: Tensor
        The Tensor that acts as input into this layer
    :param num_units: int
        The size of the layer. That is, the number of units, nodes, or neurons.
    :returns Tensor
        A new fully connected layer
    """
    layer = tf.layers.dense(prev_layer, num_units, use_bias=False, activation=None)
    
    gamma = tf.Variable(tf.ones([num_units]))#归一化参数,会进行训练
    beta = tf.Variable(tf.zeros([num_units]))#归一化参数,会进行训练
                        
    pop_mean = tf.Variable(tf.zeros([num_units]), trainable=False)                    
    pop_variance = tf.Variable(tf.ones([num_units]), trainable=False)                    
    epsilon = 1e-3
                        
    #训练阶段的函数
    def batch_normal_training():
        batch_mean, batch_variance = tf.nn.moments(layer, [0])    
          
        decay = 0.99
        train_mean = tf.assign(pop_mean, pop_mean * decay + batch_mean * (1 - decay))#计算均值,测试阶段使用         
        train_variance = tf.assign(pop_variance, pop_variance * decay + batch_variance * (1 - decay))  #计算偏差,测试阶段使用       
          
        with tf.control_dependencies([train_mean, train_variance]):
            return tf.nn.batch_normalization(layer, batch_mean, batch_variance, beta, gamma, epsilon)
     
    #测试阶段使用的函数
    def batch_normal_inference():
        return tf.nn.batch_normalization(layer, pop_mean, pop_variance, beta, gamma,  epsilon)
    
    batch_normalized_output = tf.cond(is_training, batch_normal_training, batch_normal_inference)   
                        
    return tf.nn.relu(batch_normalized_output)
def conv_layer(prev_layer, layer_depth, is_training):
    """
    Create a convolutional layer with the given layer as input.
    
    :param prev_layer: Tensor
        The Tensor that acts as input into this layer
    :param layer_depth: int
        We'll set the strides and number of feature maps based on the layer's depth in the network.
        This is *not* a good way to make a CNN, but it helps us create this example with very little code.
    :returns Tensor
        A new convolutional layer
    """
    strides = 2 if layer_depth % 3 == 0 else 1

    in_channels = prev_layer.get_shape().as_list()[3]
    out_channels = layer_depth*4
    
    weights = tf.Variable(
        tf.truncated_normal([3, 3, in_channels, out_channels], stddev=0.05))
    
    bias = tf.Variable(tf.zeros(out_channels))

    layer = tf.nn.conv2d(prev_layer, weights, strides=[1,strides, strides, 1], padding='SAME')
    
    gamma = tf.Variable(tf.ones([out_channels]))
    beta = tf.Variable(tf.zeros([out_channels]))

    pop_mean = tf.Variable(tf.zeros([out_channels]), trainable=False)
    pop_variance = tf.Variable(tf.ones([out_channels]), trainable=False)

    epsilon = 1e-3
    
    def batch_norm_training():
        # Important to use the correct dimensions here to ensure the mean and variance are calculated 
        # per feature map instead of for the entire layer
        batch_mean, batch_variance = tf.nn.moments(layer, [0,1,2], keep_dims=False)

        decay = 0.99
        train_mean = tf.assign(pop_mean, pop_mean * decay + batch_mean * (1 - decay))
        train_variance = tf.assign(pop_variance, pop_variance * decay + batch_variance * (1 - decay))

        with tf.control_dependencies([train_mean, train_variance]):
            return tf.nn.batch_normalization(layer, batch_mean, batch_variance, beta, gamma, epsilon)
 
    def batch_norm_inference():
        return tf.nn.batch_normalization(layer, pop_mean, pop_variance, beta, gamma, epsilon)

    batch_normalized_output = tf.cond(is_training, batch_norm_training, batch_norm_inference)
    return tf.nn.relu(batch_normalized_output)
    return conv_layer
def train(num_batches, batch_size, learning_rate):
    # Build placeholders for the input samples and labels 
    inputs = tf.placeholder(tf.float32, [None, 28, 28, 1])
    labels = tf.placeholder(tf.float32, [None, 10])
    is_training = tf.placeholder(tf.bool)
    # Feed the inputs into a series of 20 convolutional layers 
    layer = inputs
    for layer_i in range(1, 20):
        layer = conv_layer(layer, layer_i, is_training)

    # Flatten the output from the convolutional layers 
    orig_shape = layer.get_shape().as_list()
    layer = tf.reshape(layer, shape=[-1, orig_shape[1] * orig_shape[2] * orig_shape[3]])

    # Add one fully connected layer
    layer = fully_connected(layer, 100, is_training)

    # Create the output layer with 1 node for each 
    logits = tf.layers.dense(layer, 10)
    
    # Define loss and training operations
    model_loss = tf.reduce_mean(tf.nn.sigmoid_cross_entropy_with_logits(logits=logits, labels=labels))
    train_opt = tf.train.AdamOptimizer(learning_rate).minimize(model_loss)
    
    # Create operations to test accuracy
    correct_prediction = tf.equal(tf.argmax(logits,1), tf.argmax(labels,1))
    accuracy = tf.reduce_mean(tf.cast(correct_prediction, tf.float32))
    
    # Train and test the network
    with tf.Session() as sess:
        sess.run(tf.global_variables_initializer())
        for batch_i in range(num_batches):
            batch_xs, batch_ys = mnist.train.next_batch(batch_size)

            # train this batch
            sess.run(train_opt, {inputs: batch_xs, labels: batch_ys, is_training: True})
            
            # Periodically check the validation or training loss and accuracy
            if batch_i % 100 == 0:
                loss, acc = sess.run([model_loss, accuracy], {inputs: mnist.validation.images,
                                                              labels: mnist.validation.labels,
                                                              is_training: False})
                print('Batch: {:>2}: Validation loss: {:>3.5f}, Validation accuracy: {:>3.5f}'.format(batch_i, loss, acc))
            elif batch_i % 25 == 0:
                loss, acc = sess.run([model_loss, accuracy], {inputs: batch_xs, labels: batch_ys, is_training: False})
                print('Batch: {:>2}: Training loss: {:>3.5f}, Training accuracy: {:>3.5f}'.format(batch_i, loss, acc))

        # At the end, score the final accuracy for both the validation and test sets
        acc = sess.run(accuracy, {inputs: mnist.validation.images,
                                  labels: mnist.validation.labels,
                                  is_training: False})
        print('Final validation accuracy: {:>3.5f}'.format(acc))
        acc = sess.run(accuracy, {inputs: mnist.test.images,
                                  labels: mnist.test.labels,
                                  is_training: False})
        print('Final test accuracy: {:>3.5f}'.format(acc))
        
        # Score the first 100 test images individually. This won't work if batch normalization isn't implemented correctly.
        correct = 0
        for i in range(100):
            correct += sess.run(accuracy,feed_dict={inputs: [mnist.test.images[i]],
                                                    labels: [mnist.test.labels[i]],
                                                    is_training: False})

        print("Accuracy on 100 samples:", correct/100)


num_batches = 800
batch_size = 64
learning_rate = 0.002

tf.reset_default_graph()
with tf.Graph().as_default():
    train(num_batches, batch_size, learning_rate)
Batch:  0: Validation loss: 0.69103, Validation accuracy: 0.09760
Batch: 25: Training loss: 0.57469, Training accuracy: 0.07812
Batch: 50: Training loss: 0.45555, Training accuracy: 0.09375
Batch: 75: Training loss: 0.39003, Training accuracy: 0.10938
Batch: 100: Validation loss: 0.35794, Validation accuracy: 0.09240
Batch: 125: Training loss: 0.34876, Training accuracy: 0.09375
Batch: 150: Training loss: 0.33988, Training accuracy: 0.14062
Batch: 175: Training loss: 0.34756, Training accuracy: 0.17188
Batch: 200: Validation loss: 0.33286, Validation accuracy: 0.13800
Batch: 225: Training loss: 0.33089, Training accuracy: 0.20312
Batch: 250: Training loss: 0.30912, Training accuracy: 0.25000
Batch: 275: Training loss: 0.40437, Training accuracy: 0.26562
Batch: 300: Validation loss: 0.29348, Validation accuracy: 0.43260
Batch: 325: Training loss: 0.30869, Training accuracy: 0.45312
Batch: 350: Training loss: 0.11182, Training accuracy: 0.78125
Batch: 375: Training loss: 0.12043, Training accuracy: 0.81250
Batch: 400: Validation loss: 0.10275, Validation accuracy: 0.84940
Batch: 425: Training loss: 0.00938, Training accuracy: 1.00000
Batch: 450: Training loss: 0.03079, Training accuracy: 0.93750
Batch: 475: Training loss: 0.03406, Training accuracy: 0.96875
Batch: 500: Validation loss: 0.07192, Validation accuracy: 0.89240
Batch: 525: Training loss: 0.07040, Training accuracy: 0.87500
Batch: 550: Training loss: 0.00455, Training accuracy: 1.00000
Batch: 575: Training loss: 0.01988, Training accuracy: 0.96875

训练结果比没有使用批量归一化操作提高了很多,在这个版本中我们实现了归一化的内部细节。